![]()
![]()
![]()
![]()
![]()
![]()

|
|
|
|
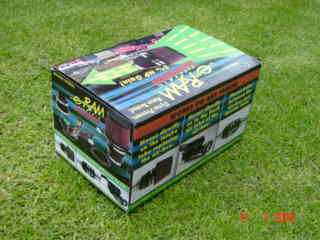
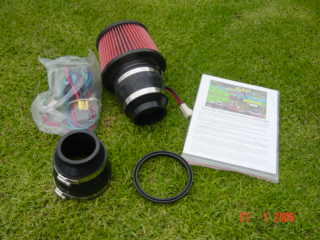
This is the first vehicle to be installed with the e-RAM in South Africa under our distribution. It is my own everyday runner and I wanted to fit the e-RAM for 2 reasons, ie, to show confidence in our own product and to use it as a "demo unit", as well as to give the vehicle that extra grunt when passing other vehicles in the slower lane / highway. This 1990 Pajero V6 3000, is a very heavy station wagon, (licensing weight unladen = 1830kg), so I never expected to get a kick in the butt when the e-RAM spools up, but I can see and feel a definite increase in the speed/duration the revs take to move around the dial when at full throttle. I installed an additional switch to enable/disable the e-RAM when doing a "demo" to potential customers as well as to show the difference when driving the Pajero on the road. There is a definite difference!!! The kit as you will receive it when purchased, does require one piece of manufacturing. This is a little bracket that you need to cut and bend to fit the micro switch on the throttle body. This took me 6 minutes to cut, bend, drill holes and fit to the throttle body. The rest of the components are all there to do the quick installation.
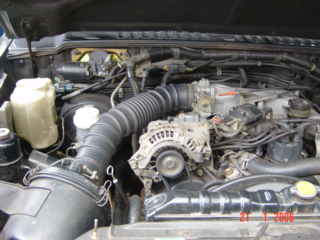
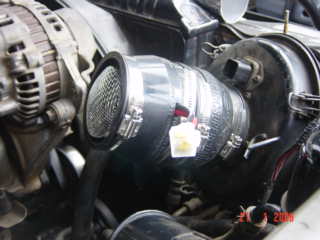
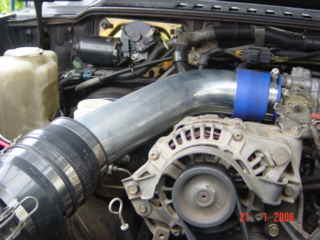
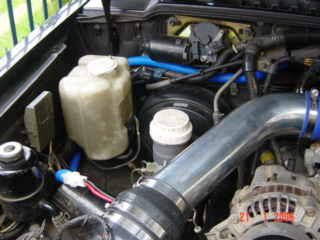
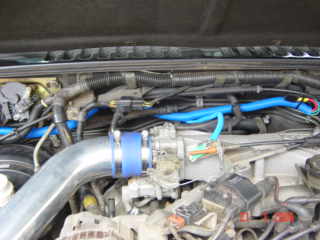
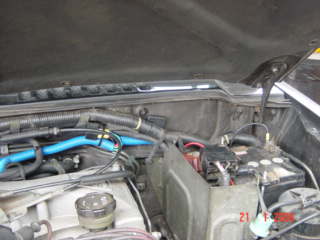
I also wanted to get rid of the standard rubber pipe between the Airflow Sensor and the throttle body, so installed an Aluminium solid pipe with some Silicone adapters. This enhances the dull look in the engine compartment. I also opted on purpose to use blue cable shrouding to show the routing and electrical reticulation when the unit is fully installed. The Dyno testing will be done in this week and I will post that as soon as it is done. This was the standard engine bay before installation started. I removed the standard rubber hose that connected the air cleaner/airflow sensor with the throttle body. I had to cut the adapter (explained and showed in the manual) to fit to air cleaner / flow sensor housing and tightened it up, perfect fit.
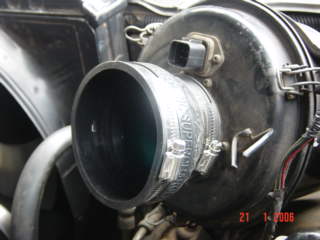
Next up was to install the e-RAM onto the adapter and fit the new RAM pipe to the throttle body. Remember that is not part of the kit but something I had wanted to do for time and included it during this conversion. You would normally cut about 146mm out of the pipe to install it in an inline configuration
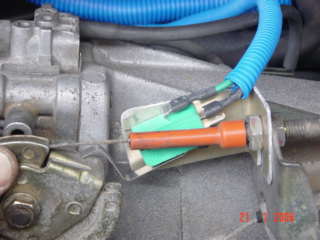
Next up is to manufacture the bracket to hold the micro switch which "switches on" the e-RAM electric supercharger. This tool all of 6 minutes, cutting from an aluminium sheet, bend, cut slot and drill holes for micro switch. You have to play around with the right configuration of the bracket and then bend the micro switch lever to switch on when the throttle is fully open.
Next up, you "loom" the wiring harness to make it look nice and tidy, feed / route the harness out of harms way in the engine bay, secure with cable straps and plug in to one-way plug on the e-RAM. Finally, connect the wiring harness to the battery and "Voila", you're BLOWN!!!
The Manual that comes in the box is easy to read and understand and if you follow it step by step, your Grandmother should be able to do it. Enjoy!!! Dyno test is on the Main News page!! |
|
Send mail to
admin@electricsupercharger.co.za with
questions or comments about this web site.
|
![[Under Construction]](images/undercon.gif)